Developing an app is just one of the steps to bring your product to life. After it's complete, you need to ensure that people can discover, download, and use it. For iOS apps, the App Store is the only distribution channel. While the European Union has introduced regulations requiring a choice in app stores, there're no means yet to distribute your iOS app to end users via other apps or websites, as you can do with Android apps.
Based on App Store Guidelines with a pinch of our experience, this article will help you get started on marketing and distributing your product.
App Store Requirements for New Apps
Before submitting a new app to the App Store, you'll need to prepare it for distribution. This process involves following the guidelines and rules set by Apple, as well as completing a number of key tasks to ensure that your app meets the necessary requirements. The tasks include preparing a developer's account, app build, legal documents, app metadata and listing visuals.
These requirements can be split into three categories:
- Technical requirements
- Legal requirements
- Product page requirements
Let's have a look at them one by one. By following these guidelines and preparing your app for submission, you can increase the chances of it being accepted and successfully distributed through the App Store.
Technical Requirements
To publish an app in the App Store, you'll need to have a developer account and a completed app build. It's important to note that the approval process for a developer account can take several weeks. It's best to set up your account as early as possible, ideally at the beginning of your app development process. This will ensure that you have everything in place and are ready to submit your app as soon as it is complete.
Creating a Developer Account
First, you need to become a member of the Apple Developer Program. There're two options for enrollment: as an individual or as an organization.
Enrolling as an Individual
If you are an individual developer, you can sign up for the Apple Developer Program as an individual. This option is suitable for solo developers or small teams working on a single app.
To enroll as an individual, you'll only need a couple of things: Apple ID with enabled two-factor authentication and basic personal information, such as legal name and address.
If you pick this option, your account name will correspond with your first and last name. It can't include a nickname or company name.
Enrolling as an Organisation
If you are part of a larger organization or team, you can sign up for the Apple Developer Program as an organization. This option is suitable for businesses, schools, or other organizations that are developing multiple apps or need to manage their developer accounts and resources as a team.
For corporate accounts, the list of requirements is a bit longer than for individuals. It includes Apple ID with enabled two-factor authentication, a DUNS number, legal entity status, legal authority to bind your organisation to legal agreements, and a website.
In case you go this route, your account name will coincide with your legal entity name.
Both options offer access to the same set of tools and resources, including the App Store, developer documentation, and technical support. However, the organization option also includes additional features such as team management tools, custom app distribution, and access to beta versions of operating systems.
Here's what membership in the Apple Developer Program provides access to:
- Software and tools, including TestFlight
- Services and capabilities, such as App Store Connect or in-app purchases
- App distribution on iPhone, iPad, Mac, Apple TV, and Apple Watch
- Technical support and developer events
For both options, the Apple Developer Program yearly fee is 99 USD without taxes. The subscription renews automatically every year until cancelled.
In case you don't want to make your iOS app public, there're two ways to do that. For enterprises, it's best to enter Apple Developer Enterprise Program, as it gives more control on giving access to apps. Another way is a recently introduced feature to unlist apps, making them undiscoverable in the App Store search. The unlisted apps are available for download only via a direct link. I'd say, it's a good feature for startups that have an MVP ready for an app review and want to get more feedback before a full-blown release.
Sharing Access with Your Vendor
If you enrolled in the Apple Developer Program as an organisation, you can easily add your vendor to a development team in your account. Once they are added, they will be able to submit app builds, as well as create app IDs, certificates, and provisioning profiles.
However, if you have an individual developer account, you will not be able to share access to your account with someone else. Instead, you will need to create the necessary app IDs, certificates, and provisioning profiles yourself, which can be done through the Certificates, Identifiers & Profiles section of your developer account.
Legal Requirements
It's important to note that developers and companies are responsible for ensuring that their apps are compliant with local laws and regulations, including those related to privacy and data protection. The App Store guidelines and this article can provide general guidance, but it's always best to consult with a lawyer to ensure that your app is in compliance.
One requirement is to provide a link to your app's Privacy Policy in the App Store listing. This document should describe what data your app collects and how it is processed, as well as any third-party data sharing that occurs. You'll also need to provide App Privacy details, which will be displayed as Privacy Badges in your app listing. These badges help users understand how their data is being used and give them the ability to make informed decisions about downloading your app.
Also, please note that Apple has recently declared that any user has the right to delete their account. This feature should be provided to users on mandatory basis.
Product Page Requirements
Your Product Page on the App Store is a critical part of your app's marketing and promotion. It acts as a landing page for your app and provides users with information about its features, visuals, and privacy details. The App Store algorithms also use the meta data on your Product Page to determine how your app appears in search results and showcases.
In order to create a Product Page for your app, you'll need to select a category and then submit texts and graphic assets such as screenshots, videos, and app icons. It's important to take the time to carefully craft the content and visuals for your Product Page, as this will be the primary way that users learn about your app and decide whether to download it.
Texts & URLs
App listing texts, also known as metadata, are the written content that appears on your app's Product Page in the App Store.
App name — Pick a catchy name to help users find your app, using up to 30 symbols. If you have some symbols left, it's a good idea to add some keywords that describe the app functionality.
Subtitle — You can add another couple of words about your app in this field. It's limited to 30 symbols as well.
Description — Tell everything that needs to be told about your app, using up to 4000 symbols. Different from app name, subtitle, and keywords, descriptions aren't indexed by the App Store search algorithms.
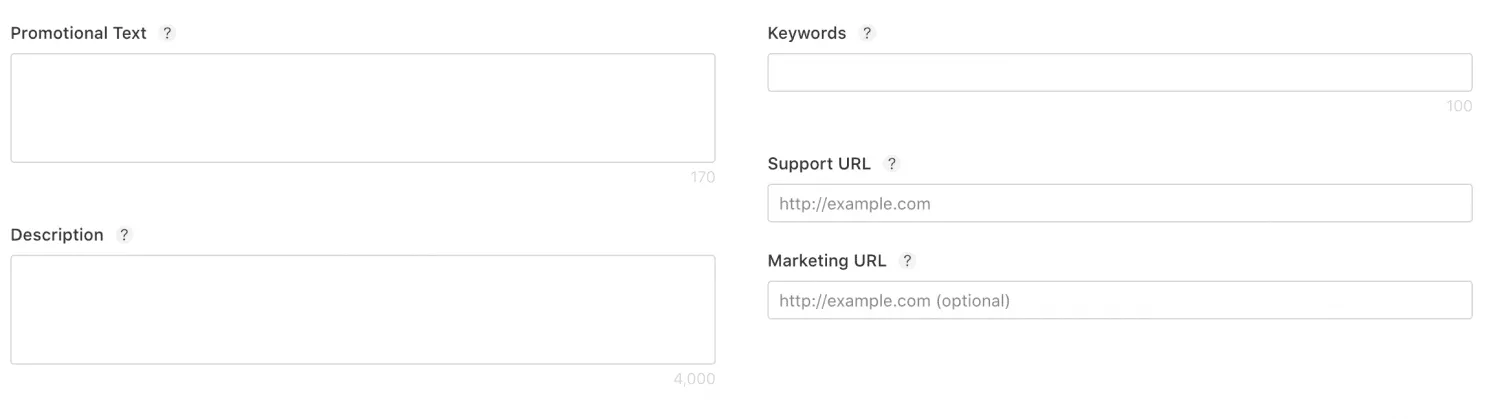
Promotional Text (optional) — This is the only part of your product page that can be changed without uploading a new app build. It shows up right above a description text and can contain up to 170 symbols.
Keywords — Keywords help your app appear in the App Store search results. They're limited to 100 symbols per one locale.
Support URL — A URL where users can ask for help. It can be your website or company page on social networks. This URL will be visible on the App Store.
Privacy policy URL — Required.
Marketing URL (optional) — A URL with marketing information about your app. This URL will be visible on the App Store.
Graphic Assets
App Store Icon — Dimensions: 1024×1024. Please note that transparent PNGs aren't supported.
App Screenshots — You need to provide screenshots for 6.5" and, optionally, for 5.5" devices. If your app is optimised for iPads, it's best to include these screenshots as well. Just images captured with your app's UI will do, but I recommend to decorate screenshots and add explanatory texts.
App preview (optional) — It's a video that can show your app functionality or gameplay. Uploading it isn't required and hardly impacts app conversion to install. However, it's a great addition to advertising for games.
Creating a New App in App Store Connect
Now that you've done all your preparation and planning, it's time to upload everything you prepared for the app listing.
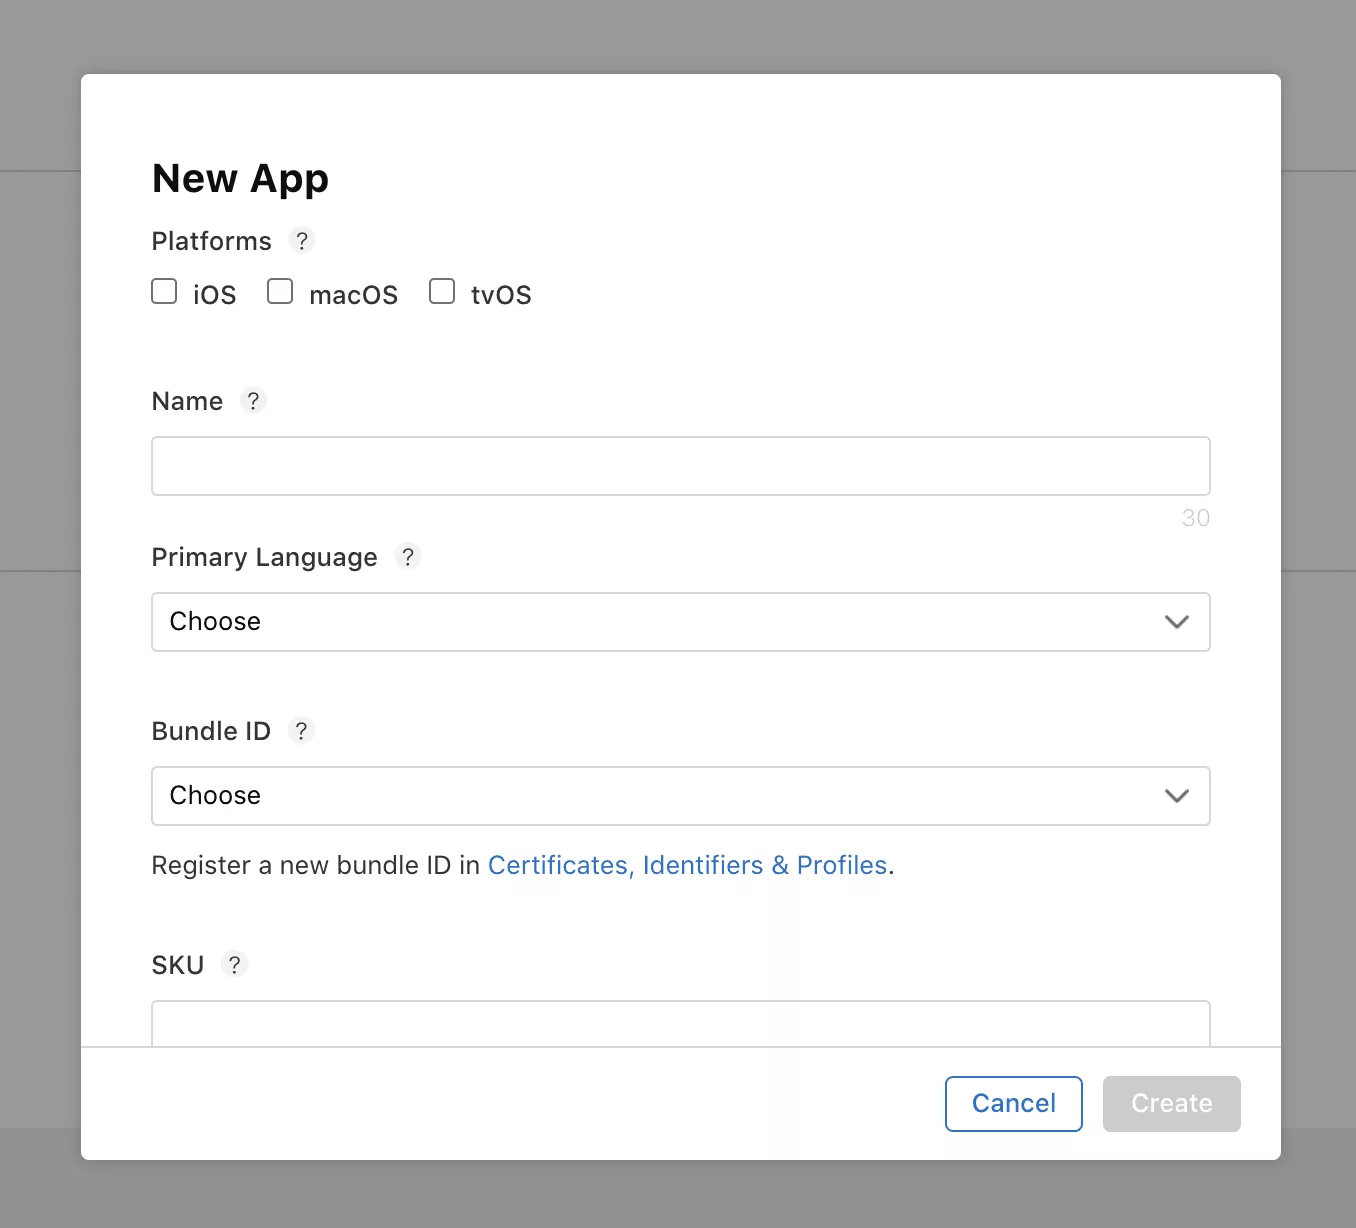
First, go to your account and click a blue plus button next to Apps in the upper left-hand corner. You'll see a dropdown, offering to pick between creating a new app or app bundle. We need the New App option, of course.
Fill in the app name, primary language, bundle ID and SKU. You also need to choose if all account users can see the app in the App Store Connect or not.
Then add images with sizes corresponding to each supported device. Please note that you need to fill in each locale separately. You can switch between them after clicking the arrow button next to "English (US)".
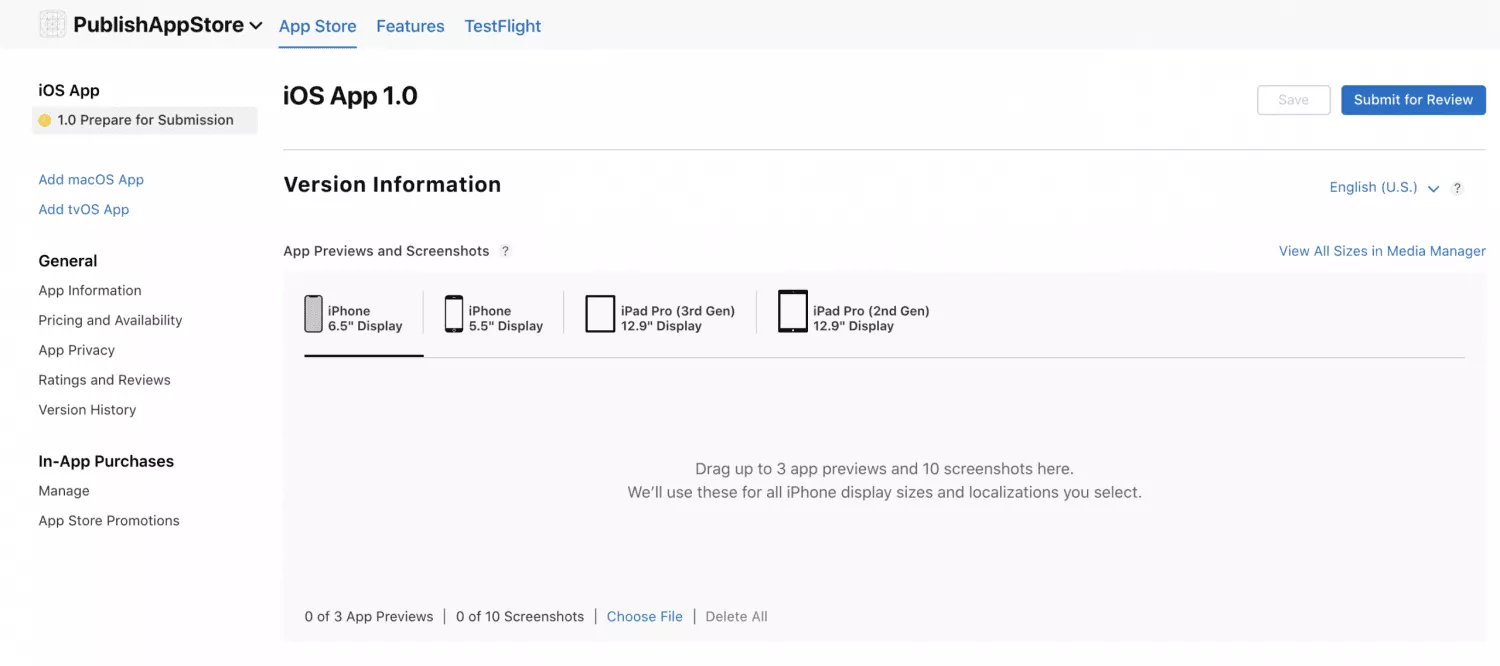
You can fill in texts in the fields right below the screenshots. Make sure you're within limits for each field described previously in the article.
After that, upload the app build. Tapping on the blue button will open a dialogue box with your app build options. It may ask if your app uses encryption. Choose the answer that fits your app's functionality.

Check if general information about the build is correct, leave testing notes if needed, and pick a release mode. There're three options: manual, automatic, and automatic with date restriction.

Then check all the info once more, confirm you have rights to use the app content, specify pricing and availability in countries and regions. After doing all this, add information about your Privacy Policy and in-app purchases.
Submit the app for review, and you're all set. It's time to wait until your app gets through to the App Store.
Going Live
The app review can take from a couple of hours to several days. If reviewers don't find any issues, the app will become available to the App Store audience without any additional hassle from your side.
Sure, App Store Review Guidelines are quite strict and might look intimidating. But it's no wonder: there are more than 1.8 million apps on the App Store already. And the number had peaked at 2.2 million before Apple decided to sweep away old or non-compliant apps. The sheer number of apps means that apart from compliance with the App Store rules, your app should be at least a little bit unique.
However, you shouldn't worry that your app will be rejected. Getting your app accepted onto the App Store can require some careful planning, but following Apple's guidelines will definitely help your app sail right through.
Hope this article will help you publish your app on the App Store with little to no effort.